Planning a wedding always involves a lot of legwork and logistics, even when we’re not in the middle of a global pandemic. Throw social-distancing measures into the mix, and you may start to wonder whether you can pull off a wedding at all. The good news is that lots of couples have managed to proceed with their big days by livestreaming their weddings for those friends and family members who cannot attend. Even though guest lists are tighter and travel is tricky, livestreaming ensures all your loved ones can still be with you in real time as you exchange your vows. This blog post not only covers why to livestream your wedding but also includes a breakdown of gear and its cost plus a timeline for pulling off the stream.
Already have the gear to livestream? Skip ahead to how to livestream your wedding.
Why livestream your wedding Ceremony?
- Ensure everyone can attend: Livestreaming lets people join you regardless of distance, sickness, travel expenses, and seating capacity. This is a great reason to stream your wedding even in non-COVID times. My 93-year-old grandmother was too sick on the day of my wedding to attend the ceremony. I wish I’d livestreamed the event so she could be there.
- Avoid being a super-spreader event: It’s sad but true — weddings are among the worst offenders when it comes to the spread of COVID. Reports of super-spreader weddings popped up in Maine, Washington, Ohio, New York, and beyond.
- Get married wherever you want: Destination weddings, though dreamy, are expensive for the guests. But if you’re livestreaming your wedding, you can get married on a beach in Fiji without all your guests having to pay for plane tickets and hotel rooms.
- Save money: Similarly, big weddings are expensive. Big weddings mean not only bigger venues and more decoration expenses but also more heads for the caterer. At many weddings, catering is the single biggest expense. By livestreaming your wedding, you can keep your in-person guest list small and intimate while still ensuring you can invite as many people as you want to watch the ceremony.
- Don’t lose your down payments: So many people have had to choose whether to postpone their weddings for the sake of safety or proceed to avoid losing the down payments they’d already paid for venues, photographers, caterers, and more. By livestreaming your wedding, you can salvage your downpayment and proceed with your wedding despite reduced seating capacity because guests can join from afar.
How much does it cost to livestream your wedding?
Have you ever heard that joke that if you put the word “wedding” before anything, that thing automatically becomes more expensive? A custom-made wedding cake could cost you ten times what a regular custom-made cake costs you. (Hence why we served Costco sheet cake to everybody at my wedding — that stuff is legit.) Thankfully, livestreaming your wedding does not have to be expensive. You can rely largely on gear you already own, iPhone and iPads. Here’s what you’ll need, plus costs:
- iPhone and/or iPad cameras: $0, assuming you or friends have iPhones
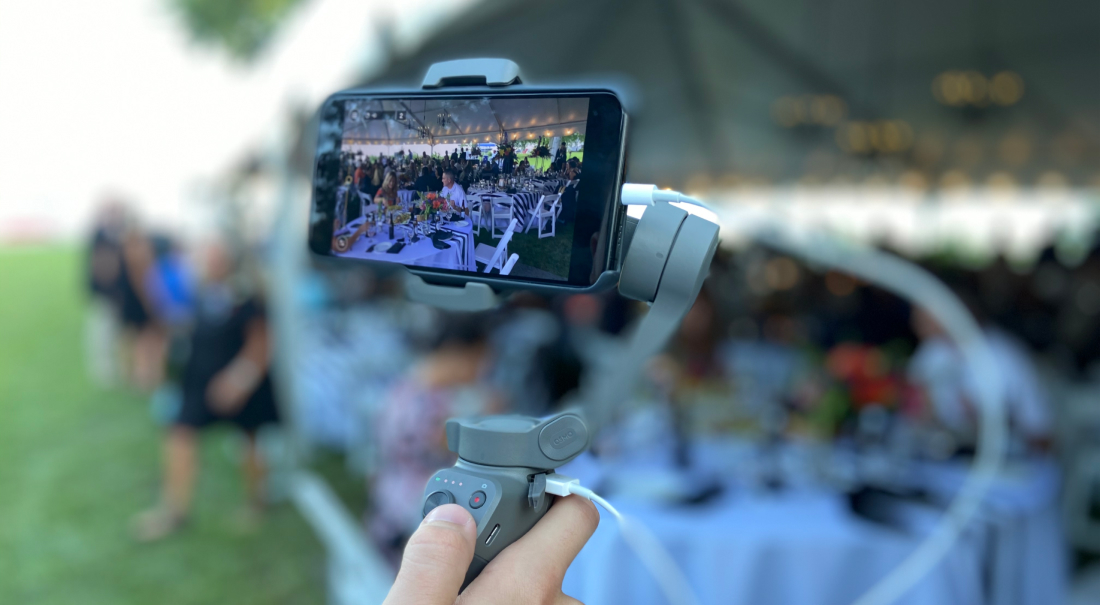
- Switcher Studio, the livestreaming software used for this tutorial, lets you connect up to 9 iOS cameras to stream your big day from multiple angles. I’m going to assume you and your fiancé[e] or friends already have a few iPhones at your disposal. iPhones are great for wedding streaming since they have a small footprint in a space but capture beautiful footage.
- Tripods for each camera: ~$25 each
- Tripods lets you set up and stabilize your iOS devices, and they’re pretty inexpensive.
- Sufficient Wi-Fi: $0-305, depending on your venue
- Many venues have Wi-Fi networks that you can use to livestream your wedding. You can even bring your own router to the venue and plug it into their internet to ensure no one else is using your network.
- If your venue does not have internet and you need to BYOI (bring your own internet), you have a couple of options: the hotspot on your phone (sufficient if you’re only streaming from one or two cameras) or a standalone mobile hotspot and prepaid data plan. An example would be a Netgear Nighthawk LTE Mobile Hotspot Router ($270) plus one month of a 15GB prepaid Verizon data plan ($35).
- Mics, audio mixer, and adapters: $17-580, depending on your venue
- Similarly, most venues have mics and audio mixers, which you can use to capture audio for your livestream. If your venue already has mics and a mixer, you’ll just need an adapter that matches the mixer’s “out” (usually XLR or ¼ inch) and your iOS device’s “in” (usually Lightning). Great options include the iRig Pre ($50) for XLR to Lightning or a combo of Sabrent USB adapter ($8) and USB to Lightning adapter ($9) for ¼ inch to Lightning. If all of the mixer’s outs are already being used, you can get an XLR splitter ($13) to create a new one.
- If your venue does not have a mic and audio mixer, you have a couple a few options:
- Mics:
- A shotgun mic ($250 for RODE shotgun mic) in the back of the room will capture all the audio in the space. It’s a quick solution but doesn’t offer the best quality.
- Wireless lav mics ($100 each for RODELink lavs) give you a little more control over placement. Ideally you’ll have at least two: one worn by the officiant (which will also pick up the couple’s audio) and one placed where any special readings will take place.
- Mixers:
- Lots of different types of mixers would work, including the Zoom H6 ($330) and the Tascam DR70 ($300). These are both battery-powered, which is especially nice if you’re having an outdoor wedding, and they both have multiple mic inputs.
- Livestreaming software: $20
- Ah, the cheapest part of your stream! You can use a 7-Day Pass ($20) to Switcher Studio’s simple iOS-based livestreaming software to manage your entire livestream (or have your livestream operator manage it) — switching cameras, adding graphics, streaming to your destination, and more. Your operator can also use Switcher’s free 14-day trial to learn the software in advance.
- Operator: Up to you
- Since this is a DIY livestreaming tutorial, it’s perfect for getting a friend or family member to serve as your livestream operator for your big day. Friends and family are often eager to help out with weddings for free or as their wedding gift to you, so what you choose to pay depends on your budget and whom you ask.
How to livestream your wedding Ceremony
Once you know what gear and software you need, livestreaming your wedding is pretty simple! Just don’t leave your streaming tests to the day of the wedding. Make sure the person operating your stream can get into your venue in advance to decide on camera placement, test the Wi-Fi, check the audio, and generally ensure everything’s good to go.
Weeks out:
- Find an operator for your stream: Ask a friend or family member (ideally someone moderately tech savvy) if they’d be willing to livestream your big day.
- Find out about the tech setup at the venue: Reach out to your venue and find out what their audio setup and Wi-Fi network are like. You can even ask whether they already have a streaming setup!
- Purchase or borrow gear: Once you know what your venue has and what they don’t, purchase or borrow the rest of the gear you’ll need, using the list above as a guide.
- Choose a streaming platform: Decide where you’re going to livestream your event. The most popular platforms are YouTube and Facebook. More on choosing a platform in the next section.
- Choose a streaming software and get your operator familiarized with it: Though there are lots of different streaming software out there, you can’t beat Switcher Studio for an affordable, easy-to-learn tool that works with iOS devices and nearly any streaming service out there. Get your operator to start a free trial of Switcher and start learning the tool.
- Send a livestream save-the-date to your guests: Send a paper or digital save-the-date to your guests with information about when and where they’ll be able to watch your wedding. You won’t have the URL this far in advance, but you can still give them a heads up.
Days out:
- Create any stream graphics or countdown videos: Switcher lets you add graphics, prerecorded video, text, and more to your livestreams. If you want to add a welcome graphic, a video of your engagement photographs, or anything else to your livestream, prepare it in advance.
- Schedule your livestream and share the URL: Most streaming platforms let you schedule your stream one week in advance. Once you schedule your stream, you’ll have a URL that you can share with the people who will be watching your livestream.
- Test your streaming setup at the venue: Invite your stream operator to your rehearsal and have them set up everything (cameras, audio, networking) and conduct a test livestream. The rehearsal is the best place to do this because all the wedding stakeholders — the couple, family and bridal party, wedding coordinator, officiant, etc. — will see ahead of time where cameras will be.
- Go over the plan with the officiant and wedding coordinator: Give the officiant and wedding coordinator a special heads-up about the streaming plans so there are no surprises on the day of.
Day of:
- Set up your cameras around your venue: Everything should be easy peasy here for your stream operator because they’ll have already figured out placement in advance.
- Connect your gear: Having tested the software and setup already, your operator will be familiar with all this at this point — they’ll connect your iOS cameras over your Wi-Fi network and connect your mics and audio mixer to the iOS device running Switcher Studio.
- Stream to your scheduled event: Because you’ve already scheduled your livestream, your operator will simply tap the stream destination and scheduled event in Switcher to stream right to the URL you already shared with friends and family.
- Edit while you stream: Here’s where the magic happens — your operator can use Switcher’s live-editing features to switch angles, add in your media assets, and generally polish your entire livestream as the wedding happens.
- Export the video in HD: After your stream, if your operator has used Switcher’s Director Mode, they’ll be able to export HD footage from all of your devices into a journal file perfect for post-wedding editing if you want a wedding video.
Camera, platform, and wedding livestream pro tips
Where to place cameras for a VIRTUAL wedding livestream
As mentioned above, one of your stream operator’s tasks will be to decide where to place the cameras for your wedding livestream. Here are a few tips specifically for them:
- Place one of your cameras in the back as a wide backup safety shot that you can always cut to.
- Keep in mind that people may be standing for portions of the ceremony, so don’t place cameras in spots where they’ll be blocked if attendees stand up.
- If possible, try to set up your cameras so large windows are not behind the couple. If windows are unavoidable, use Switcher’s camera controls to adjust the exposure.
- If you’re setting up the stream and then leaving it to do its thing rather than manually monitoring it, consider using Switcher’s Auto-Switch mode to have angles switch automatically throughout the ceremony.
- If you can’t charge all your devices immediately before the ceremony, attach small battery packs to your tripods and plug in your cameras during the stream.
Where to livestream your wedding
There’s no one right place to livestream your wedding, but when it comes to ease, it’s hard to beat Facebook and YouTube. These are not only free platforms to stream to but also familiar for your guests to access. It’s also easy to control who sees your stream through these platforms’ privacy settings.
One important thing to note is the copyright restrictions on these platforms. If you have musicians playing live covers or original pieces as part of your ceremony or reception, you’re unlikely to run into any copyright issues. If, however, you play recordings of copyrighted music during your event (we recessed to a recording of Hall and Oates at my wedding), Facebook and YouTube may automatically take your stream down even if you’ve obtained the necessary licenses. This isn’t necessarily likely, but it is a possibility. This is because Facebook and YouTube automate the handling of copyrighted content claims. So if you’re streaming to Facebook or YouTube, make sure to have your stream operator mute the audio during portions of your event in which you’re playing copyrighted music.
Join the Switcher Studio community
If you and your operator are using Switcher for the first time for your wedding livestream, consider joining the Switcher Studio 101 private Facebook group, which is specifically for new Switcher users. You’ll be able to chat with our experts, get recommendations on tech and setup, and learn from other livestreamers. Happy streaming!
Subscribe to the blog
Sign up to receive notifications whenever a new blog post is published. You may unsubscribe at any time.

Share
About the Author

As Switcher's content strategy manager, Kate strives to answer the questions of new and expert livestreamers alike. She has spent her career in digital marketing and content strategy and now funnels that experience into helping others plan and create their own video content.
All posts by Kate Brannen Smith


